

ERC(Ethereum Request for Comments). ERC-20 token is a standard for fungible tokens(This means, every token is exactly the same). ERC-20 tokens can be used as a medium of exchange, for voting rights, and so on.
Build your own ERC-20 token(cryptocurrency)
Tools needed
Getting started
Starting out, we need to set up our metamask and put in some Ethereum (ether). Here is how to set up metamask or
Now we've set up our metamask, we will navigate to Open Zeppelin Wizard. Open Zeppelin Wizard gives us access to making our own token without having to write the code from scratch. Cool right :)
The Open Zepplin should look like this
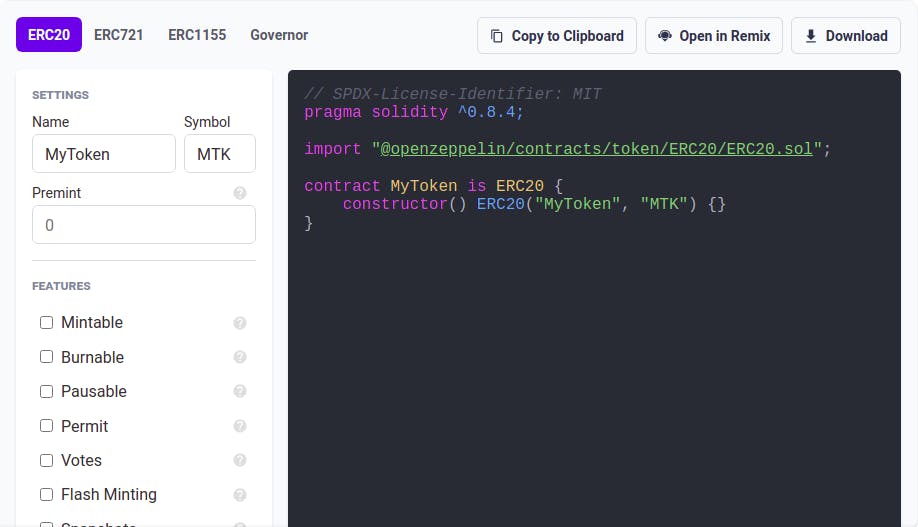
There in Open Zeppelin Wizard, there are a few things we need to create the ERC token
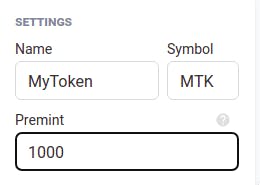 We need to give our cryptocurrency a name, a symbol, and the amount of crypto we need in our token. Once that is done we will take our code to our code editor to make a few changes. To do that you click on the Open remix button.

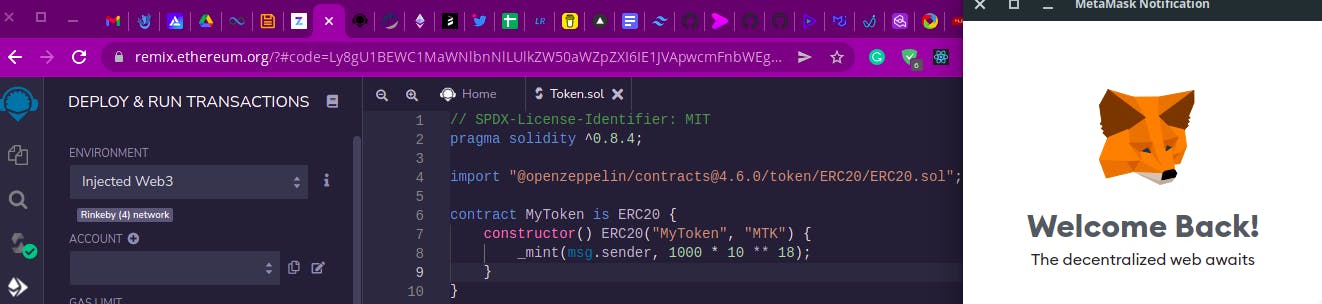
Here in the remix IDE, our code should look something like this
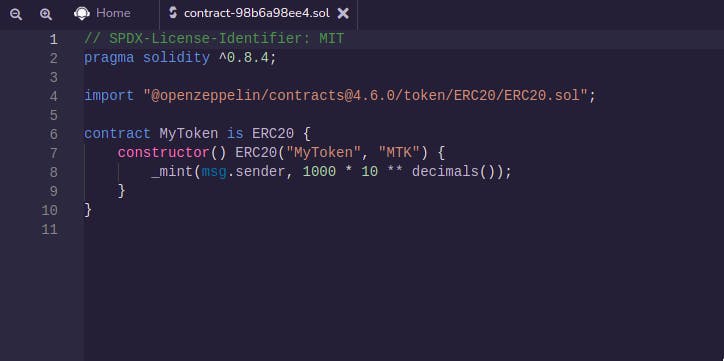
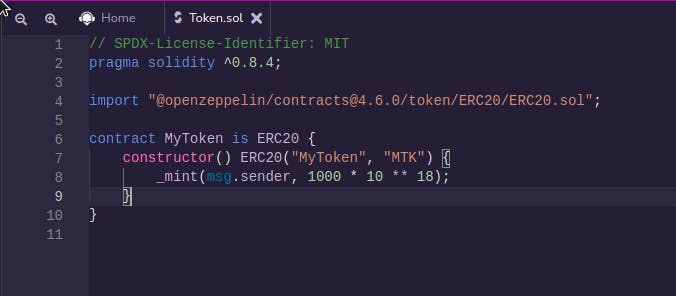
Our code looks really nice already but we need to change a few things like the name of your file to token.sol or whatever you want to name it and the decimal, You want to change it to 18.
Now our code looks like this with a really cool name 😎
Code Analysis
Our code structure seems pretty confusing right, let's break things down: Whenever a new Solidity file is created, it’s mandatory to add the License-identifier and the pragma to specify the Solidity version the compiler should use to build our code. The license identifier is usually on the first line of a solidity code
// SPDX-License-Identifier: MIT
Right below that is the version of solidity we are using version ^0.8.0. The “^” means the code is compatible with any version of the compiler from Solidity 0.8.0 to 0.8.9.
import "@openzeppelin/contracts@4.6.0/token/ERC20/ERC20.sol";
This line of code imports Open Zepplin
contract TestToken is ERC20{
This line of code declares a contract called TestToken and states that the contract is an ERC20 token(which we imported from Open Zepplin)
constructor() ERC20("DevToken", "DVT"){
This line declares a constructor with an ERC-20 standard that states the name and the symbols of the token
_mint(msg.sender,1000*10**18);
This line is a syntax that is entirely different from the others. This allows you to mint your tokens. The _mint method is inherited from the ERC-20 contract and is used to create new tokens and send them to a given address.
You are probably asking what minting is, well minting is the process of validating information, creating new blocks, and recording that information onto the blockchain.
Let's say we want to create 1000 tokens. We can do that with the code below
_mint(msg.sender, 1000*10**18);
Here the mint function takes two parameters:
- To: The address of the wallet that would receive the token.
Amount: The amount of the token we want to send.
NOTE: The msg.sender is a special variable in which the value is the address of the wallet/contract calling the contract.
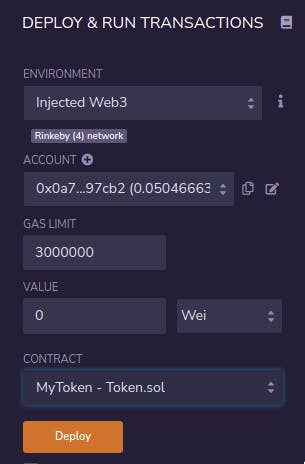
Deploy the contract
Now we are done writing code, we will move to the solidity compiler on our remix ide
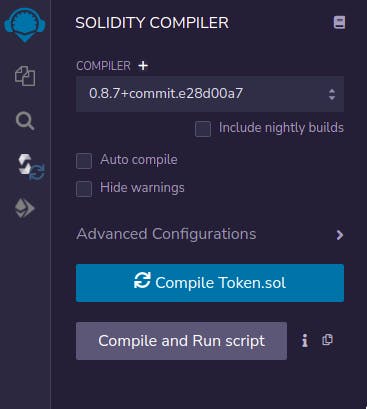
On here in the compiler, hit compile token button.
If your compilation was successful, you will get the following
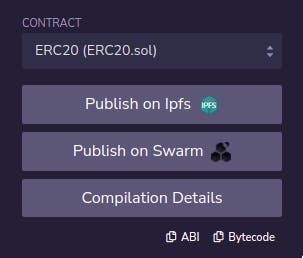
Now we've successfully compiled our contract, we may now move to the deploy page
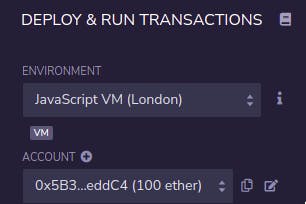
On our deploy page, we need to switch our environment to injected web3. When you're switching to injected web3, you will get a metamask popup to connect your account.
Now we've switched to injected web3 we may now deploy our contract
Now we've hit deploy, we should get a metamask popup request to verify our transaction. Hit verify.
Congratulations, you have successfully created your own cryptocurrency.
Adding Our Cryptocurrency to Metamask
Now we've successfully deployed your ERC-20 token to the blockchain we will now make it visible on metamask. To make it visible you go over to your console in your remix immediately after deploying your contract and copy the deployed contract address and then you head over to etherscan and paste your already copied address. You can now see the transactions you made with that address. Your etherscan should look like this:

You should copy the contract address from etherscan and head over to metamask.
In your metamask, click on import tokens at the footer of the page. When you click on import tokens you get directed to this page:
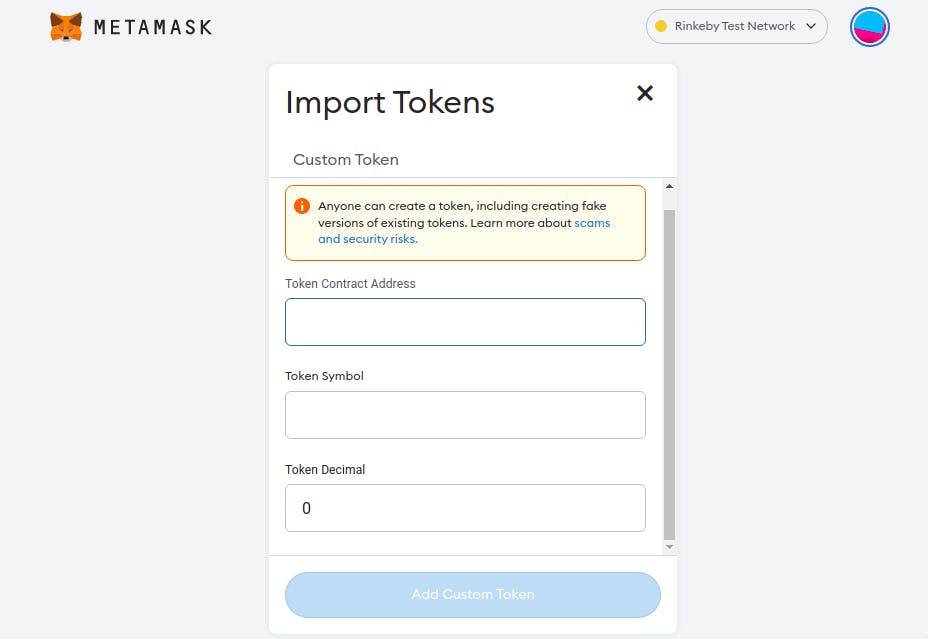
Here on the import token page, paste the link that we copied from etherscan. Once you paste the link, every other thing about this token we've created will be auto-imported. It should look like this when the import is done:
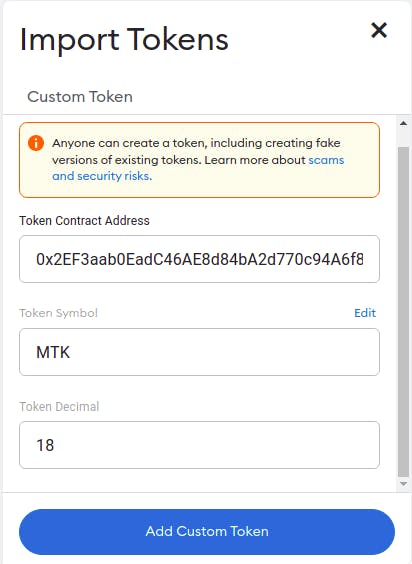
Now we will click on the add custom token button. Our token should look something like this:
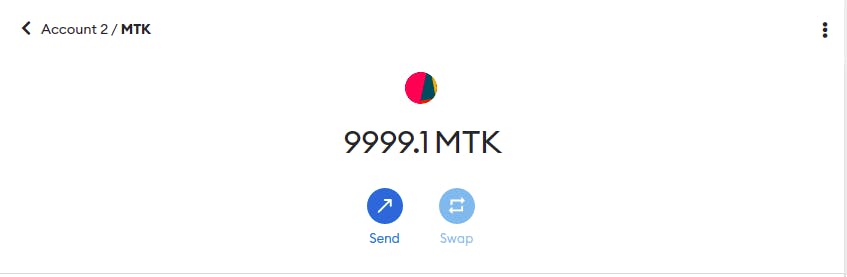
CONGRATULATIONS!! We have created a Cryptocurrency